School mornings are busy. As a mum of three, with 14 years of school mornings under my belt, I learned one thing very early on – the less we have to do in the morning, the smoother the morning runs. And when the day starts well, everything else tends to fall into place.
Mornings are busy enough without adding last-minute lunchbox decisions into the mix. Over the years, I’ve refined a system that works for our family and makes packing school lunches far less stressful.
These school lunchbox tips are based on what works for us – I plan and prep ahead of time, making it simple for the kids to take care of the day-to-day lunchbox making themselves during the week.
Hopefully this run-down can help ease the load for your busy mornings.
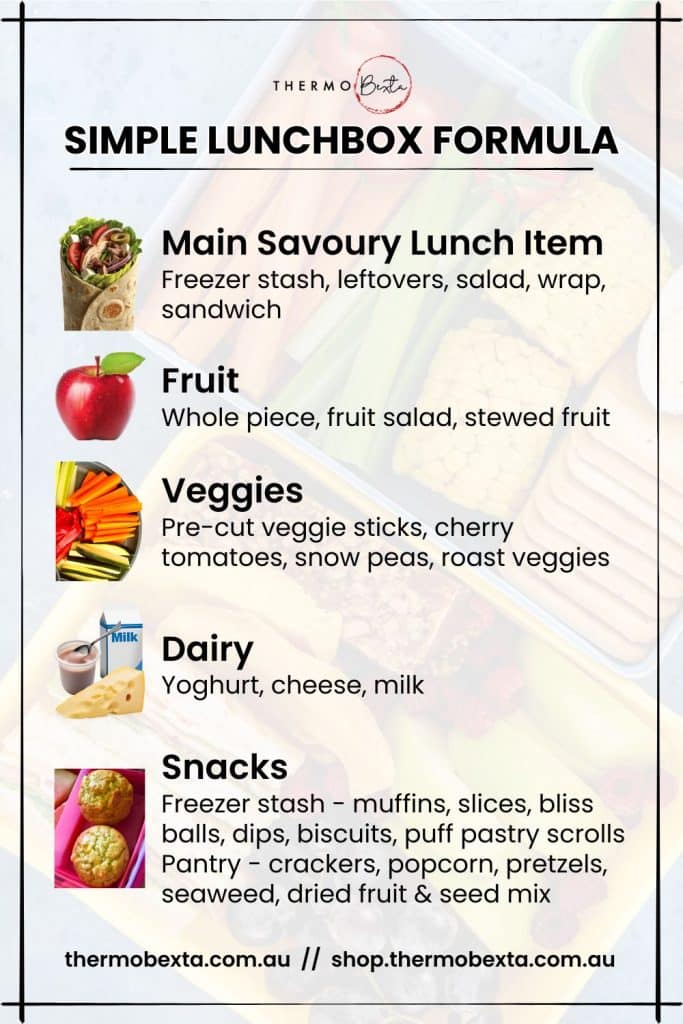
1. Start With a Simple Lunchbox Formula
It took some trial and error, but one thing I arrived at over time is that moving away from daily decisions and having a system in place really simplifies things.
Most days, our lunchboxes include:
- A savoury lunch item
- Fruit
- Veggies
- Dairy
- One or two extra snacks
The foods change, but the structure stays the same.
Here’s how each part usually looks for us:
The savoury lunch item
This is the main part of the lunchbox. Sometimes it’s made fresh, sometimes it comes from the freezer.
Common freshly made options here include:
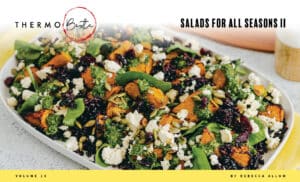
- Salads – usually leftovers from dinner, anything from one of the Salads For All Seasons books or Summer Meal Mix Up. Depending on the salad, some form of protein might be added. For us, this is usually boiled eggs, a tin of tuna, or legumes like edamame or chickpeas.
- Quiche
- Sushi
- Spinach & Cheese Rolls
- Soup, with bread for dipping
- Dinner leftovers like pasta or curry, warmed up and packed in a thermos (although one of mine prefers to eat everything cold so just a regular container for her!)
- A sandwich, roll or wrap – one of my kids chooses this option most days, one occasionally, and never for my eldest.
If this part comes from the freezer, it might be one larger item or a couple of smaller ones, depending on what’s available.
I batch cook as needed and have a dedicated space in the freezer for lunchbox items (more on this further down). Some of the most-made items for us are:
- Savoury scrolls – these have been popular here for most of the girls’ lives. I always use the Pumpkin Scroll dough (Lunches & Snacks Made Easy) making several batches at a time and filling each with a different mix. Filling ideas include:
- Very veggie sauce, ham and cheese;
- BBQ sauce (I made this one for years but since creating the one in MMOAB it’s now my go-to), salami and cheese;
- nut-free pesto and cream cheese;
- butter, vegemite and cheese;
- Cheats Napoletana sauce (from FFME), olives and cheese
- chicken and cashew cheeze;
- spinach and fetta
- Cheesy savoury muffins
- Spinach & corn pikelets
- Cauliflower cheese waffles
- Mexi Muffins
- Savoury veggie muffins, Halloumi muffins, Curry puffs, Puffed pesto pinwheels, Knot rolls (All Day Eats)
- Sausage rolls, Pizza rice cakes, Vegetable fritters (Lunches & Snacks Made Easy)

Fruit
Fruit goes into lunchboxes every day – some days one piece, other days more.
- Whole pieces of fruit are quick and easy
- Fruit salad is especially popular here in the warmer months when the best fruits are in season. We prep enough for a couple of days at a time and the kids portion into smaller containers as needed. Things like rockmelon, watermelon, grapes, strawberries, kiwifruit, blueberries, pineapple and stone fruits
- Stewed fruit is a great option – especially if I have a surplus of something, or fruit isn’t being eaten as quickly as expected. Cooking it up extends its life, and changing the form often makes it appealing again
- And let’s be real – if I’m having a particularly busy week and the fruit bowl is looking sad, sometimes the kids resort to frozen cherries or blueberries
Veggies
Veggies are another non-negotiable, just something simple.
- Myself or one of the kids prep vegetables in advance and pop in a container in the fridge, ready to be portioned into smaller containers as needed:
- Cucumber, celery, capsicum and carrot sticks
- Snow peas or sugar snap peas
- Baby carrots
- Cherry tomatoes go up and down in popularity here – sometimes I can’t keep up with the demand
- One of my girls also went through a long phase of packing herself a small container of frozen corn every day! By recess time it was defrosted and she loved it.
Dairy
- Yoghurt
- Cheese and crackers
- Chia pudding or overnight oats with a yoghurt base
- Diced fetta cheese – usually incorporated in with the veggie option, with cherry toms, diced cucumber and a few olives
- Milk
One or two extra snacks
I’m sharing general ideas here, there are lots of options for these sorts of things in Lunches & Snacks Made Easy and All Day Eats.
These might come from the freezer, such as:
- Muffins – sweet or savoury
- Banana bread
- Bliss balls
- Muesli bars
- Biscuits
- Slices
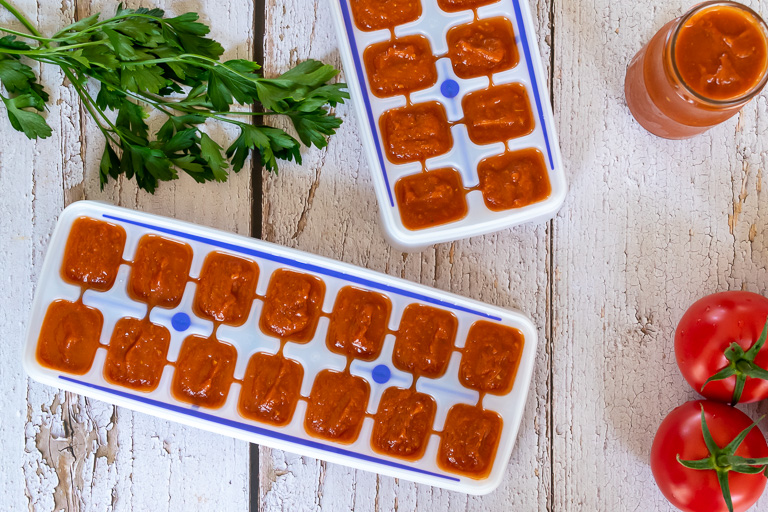
- Dip – most homemade dips freeze well. I freeze portions in dedicated ice cube trays.
Or from the pantry:
- Crackers – usually my Easy flatbread crackers (ADE), or sometimes the Seed & grain crackers (LSME). I make several batches at a time, as they store very well for a long time in airtight containers
- Popcorn (this Home made Sweet & Salty Popcorn is pretty special! It keeps for about a week in an airtight container)
- Rice crackers
- Seaweed snacks
- Dried fruit or seed mixes
- Mini packs of chips
Why this works so well
Having a basic structure like this means lunchbox making is quick and easy – no overthinking, no negotiating, and no last-minute scrambling. Plus…
- Lunchbox making is quick and easy
- A good freezer stash means minimal effort during the week
- The freezer items change, but the system stays the same
- Kids can be independent and have choice within boundaries
- You’re not making decisions every day
- Lunchboxes don’t rely on morning motivation
At a glance:
2. Batch Cook and Build a Lunchbox Freezer Stash
Rather than making lunches from scratch every day, I spend a few hours as needed throughout the year batch cooking and portioning lunchbox-friendly foods. This saves us so much time! One block of time reduces daily pressure.
There’s no strict schedule to this – I just top things up when the freezer stash starts to dwindle.
The goal isn’t to fill the freezer with everything, but to always have a reliable selection of options the kids can choose from.
How to build a lunchbox freezer stash – step-by-step
Over the years, I’ve built up a solid list of foods that work well for us – things my kids enjoy, and that I feel good about them fuelling up on at school.
I’ve already shared lots of examples and links to recipes and relevant cookbooks in the section above, so if you missed it, scroll back up for inspiration.
Step 1 Make a list of possible options
Make yourself a cuppa, sit down, have a browse and make a list. At this stage, don’t limit yourself – add anything you think might appeal to your family.
As you go, make a note of where each recipe comes from:
- Website
- Or the book acronym (LSME / ADE / M&M), plus the page number
Here’s where to look:
- My free recipes
This link takes you the full list of recipes here on the blog. Add anything that could work for your freezer stash, or move on if it’s not quite right. - Lunches & Snacks Made Easy
I created this recipe book as a one-stop collection for reliable lunch and snack options for school, home, work and picnics.
Over 7.5 years later, I still make many of these recipes regularly. If I had dollar for every time I’ve rolled out pumpkin scroll dough, peeled boiled eggs for egg salad sandwich filling, or made myself cry peeling onions for the French onion dip, I’d be a very rich woman! - All Day Eats
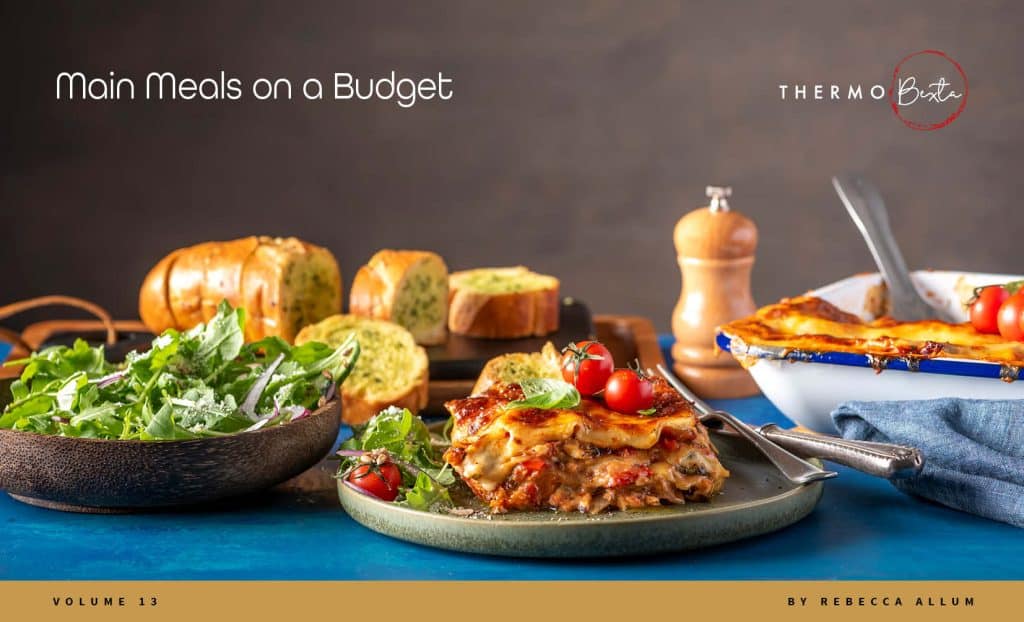
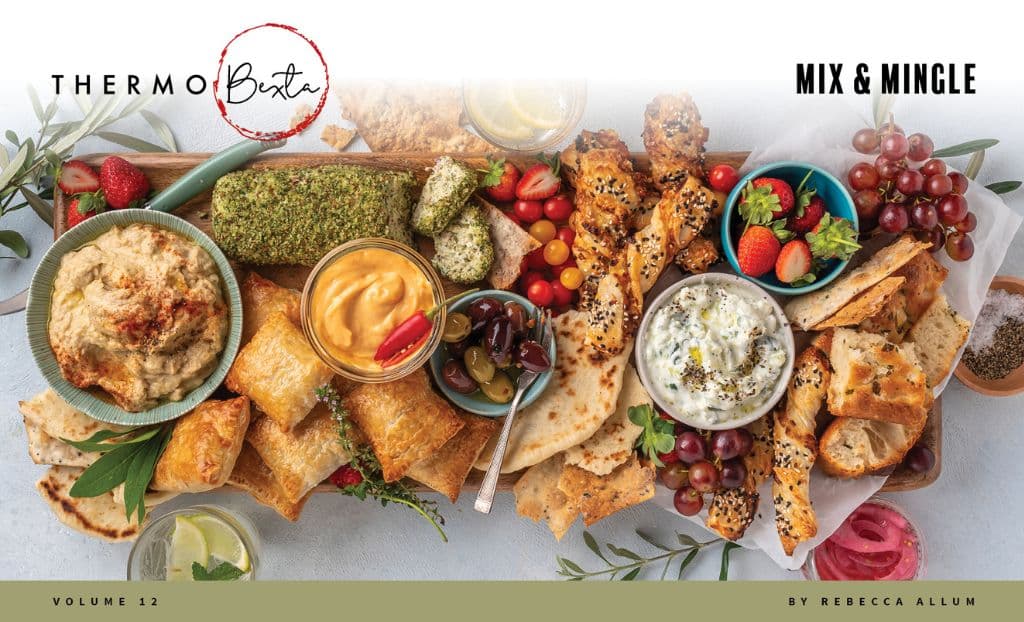
After the success of LSME and many requests for more, All Day Eats came together – and it quickly became another family favourite. There are plenty of regular lunchbox recipes in this one for us. - Mix & Mingle
This was created as an entertaining and grazing board resource, but I now regularly pull recipes from it for lunchbox batch cooking. If you’ve got it, it’s well worth having a look through when making your list.
Step 2 Create a realistic shortlist
Once you have your list, go through and choose a few recipes for your cook-up.
If my freezer stash is looking pretty depleted, I’ll set aside a few hours and choose five or six different recipes, usually making multiple batches of the ones I know are most popular with my lot.
If time is tight or the freezer food levels aren’t looking too bad, I’ll just do what I can manage – sometimes that’s only one or two recipes.
Be realistic about what you’d like to achieve. It always feels good to tick everything off a list, so try not to be over-ambitious.
Step 3 Make a shopping list and get your ingredients
Go back through the recipes you’ve chosen and create a shopping list for anything you don’t already have on hand. Many lunchbox recipes rely heavily on pantry staples, so this is usually a pretty budget-friendly exercise.
Buy the things you need – I’m a big fan of click-and-collect orders, they save time and are a good money-saver as they prevent mindless spending.
Step 4 Plan your storage
There are endless ways to store food for the freezer, and chances are, you won’t need to buy anything new.
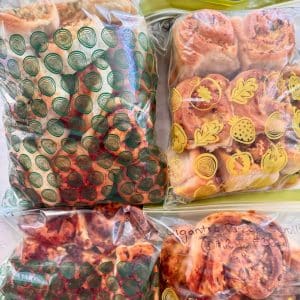
Over the years, I’ve tried a lot of containers and storage systems, but the simplest option I’ve found for the majority of things for the lunchbox freezer stash is also the cheapest: Ziplock bags. Big ones. They’re inexpensive, easy to source, and great for storing multiple portions together. I use large, sturdy ones from IKEA, but any decent quality bags will work.
These bags can be reused many times. I usually just give them a shake to remove any crumbs, and refill them with freshly made morsels!
Step 5 Cook, portion, freeze
When it’s time to cook, I try to work in a way that makes the most sense.
Before I start working recipe-by-recipe, I do a bit of prep to minimise washing up and bowl changes.
- If any recipes need dry pantry ingredients milled (e.g. sugar), I’ll do this first
- Next, any herbs that require chopping
- Then I grate any cheeses needed
- After that, I move on to kneading the doughs
Once the doughs are done, the bowl will need a good clean.
If you have multiple bowls, put them all to use during these cook-ups!
From here, I decide on the order I’ll make everything, then get into it.
Once everything is made, allow it to all cool to room temperature.
Some items might stick together if they’re packed straight into bags or containers, so anything like this I freeze in batches on trays before moving them to bags – usually a couple of hours for each round of trays – until frozen, or close enough to it.
Once everything is cooked, cooled, portioned and frozen in lunchbox-sized amounts, it’s easy for the kids to grab what they need.
Lunchbox Tip: A dedicated freezer space makes all the difference
One thing that really simplified this whole system was setting aside a dedicated freezer section just for lunchbox food.
Anything in that space is lunchbox-approved.
That means:
- Everyone knows exactly where to look
- No needing to ask permission to take something
- The kids can pick and choose freely, and I know whatever it is will work
This small setup makes things clear, speeds things up, and makes the system more sustainable.
3. Keep the Rest of the Lunchbox Simple, with Basic Prep as Needed
With the freezer stocked, the rest of the lunchbox stays very straightforward.
I shop once or twice a week to keep fresh fruit, veggies, yoghurt and bread on hand.
I also have a snack box in the pantry with store-bought ready-to-eat lunchbox options for the kids to choose from.
On a Sunday afternoon, and sometimes again mid-way through the week, we may do a bit of prep – cutting up raw veggies to go into a container in the fridge, filling small containers with portions of yoghurt, or perhaps making something fresh – often this will be the beetroot salad roll filling from All Day Eats, or one of the sandwich fillings from Lunches & Snacks, or mashing up a large tin of tuna with mayo and spring onion, if sandwiches/rolls/wraps are the vibe at the time. More often than not, the kids will take care of this prep.
4. Pack Lunchboxes the Night Before – or Better Still, Get the Kids to do it
With everything on hand and ready to go, lunchboxes are packed the night before, not in the morning.
I’m absolutely not a morning person, and one of my kids is even less of a fan of them. So getting lunchbox-making out of the way in the evenings makes a pretty big difference to our mornings.
Each evening, the kids pack their lunchboxes guided by the simple lunchbox formula I explained above.
Once packed, they go into their insulated bags and into the fridge overnight.
In the morning, ice bricks are added, water bottles filled up, and off to school they go.
Gentle guidance pays off
If your children are only just starting school, or the thought of putting their own lunchboxes together is too much for them just yet, perhaps get them involved with making them alongside you – allow them to make decisions on the foods they take, guiding them and teaching about good choices and balance.
All kids are different. My older two packed their lunches with me on and off throughout primary school and became independent with it at different stages. My youngest – very much a typical third child – insisted on packing her own lunchbox from her first day of kindy. With two older sisters already doing theirs, there was no way she was missing out… and honestly, who was I to stand in her way?
5. Focus on Systems, Not Daily Effort
This approach works because the main effort is done in small blocks of time throughout the year. It turns nightly lunchbox prep into a quick, easy task, rather than adding pressure to already busy mornings.
Instead of relying on motivation every morning, the system makes things run smoothly:
- Batch cooking
- A freezer zone everyone understands
- Kids packing their own lunchboxes at night, freeing up extra time in the mornings to get ready for the day
6. Keep Lunchboxes Realistic (and Sustainable)
There will be days when lunchboxes are repetitive or basic, and that’s ok. Or you don’t realise until right before you leave the house that one of the kids didn’t make their lunch the night before. These things happen.
This system is customisable, but it isn’t flawless because, well… real life! It’s designed to support busy families and ease the pressure.
When most of the thinking and prep is done ahead of time, lunchboxes become quicker to put together and far less stressful. Kids get food they enjoy, and the load of busy mornings is lightener.
Lunchboxes don’t need to be elaborate. They don’t need to look impressive. And they certainly don’t need to be stressful.
A simple structure, a well-used freezer, and a system that works for your family is more than enough.
A Final Note
Well… that was a long one. If you’re still with me, thank you for taking the time to read it all!
I hope there are a few ideas in here that help make school mornings for you and your family run a little more smoothly – even if it’s just one small change you take away and make your own.
If you have a lunchbox tip, freezer idea, or routine that works well in your house, I’d love for you to share it in the comments below. We all do things differently, and there’s always something new to learn.
To get started recipe-wise, many of the lunches and freezer staples mentioned throughout this post come from my cookbooks, especially Lunches & Snacks Made Easy and All Day Eats, as well as some from Mix & Mingle. They’re the books I reach for most often when I’m cooking for school lunches.
You can find all of them here: shop.thermobexta.com.au
You might also be interested in these recipes...


Hi, I'm Bec
I specialise in great tasting vegetarian Thermomix recipes and cater for a wide range of dietary needs. I love sharing here and in my cookbooks my healthy, delicious recipes (of course the odd treat too!) Whether you’re looking to ignite your thermo mojo, or just after some new, really tasty family friendly recipes, there really is something here for everyone